Assemble a Printed Circuit Board
You have probably seen a printed circuit board (PCB) in your daily life; they’re those small green boards with markings that resemble a maze. They are a critical component within all electronic devices, connecting the different parts to ensure proper functionality. Assembling a PCB is a multifaceted process, one that requires specialized tools and expertise. Whether you’re building your own prototype or need a batch of production boards, understanding the assembly process is important to ensure a successful product.
The first step in a proper circuit board assembly is to create a schematic. This can be done using software platforms such as Mentor PADS or Allegro, and allows for a clear picture of how the board is going to operate and where it’s designed to place components. This step is critical to ensuring that the finished product will function according to your blueprints and will follow all electrical parameters.
After the schematic is created, it’s time to begin laying out the physical components. This can be done either by hand or with a piece of specialized equipment called an autorouter. These machines use a computerized system to cut the copper and remove any excess material that may interfere with a solid connection between the conductors.
How to Assemble a Printed Circuit Board
Once the traces and spaces are laid out, they can be plated with copper via an additive or subtractive process. In the additive process the bare laminate is covered with a photosensitive film, exposed to light, and developed which removes the unexposed portions of the film. Then the bare substrate is plated with copper in the sensitized areas of the film. In the subtractive process, the bare substrate is coated with a layer of prepreg resin, then patterned with copper foil, and finally etched to reveal the conductors.
The next step is to drill holes in the pads of the traces and spaces. Then a prepreg is applied and a mechanical press is used to fuse the layers together. After the prepreg is in place, metal clamps hold the layers in alignment while the laminating press applies heat and pressure to melt the epoxy and fuse the layers together.
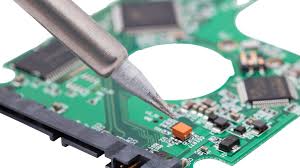
Once a board is assembled, it must be tested to make sure that all the connections work correctly. The testing process can be performed in a variety of ways, including ohmmeter tests and continuity checks. When all of the connections are confirmed to be functional, a technician can then call the finished PCB complete and move onto the next project.
When you’re ready to get started, be sure to choose a manufacturing company that is thorough with the assembly process and can handle both through-hole and surface mount technology. With the right manufacturer and knowledge, you can be confident that your circuit boards will be as effective and durable as possible. Sierra Circuits can help you bring your ideas to life with our extensive line of products and services. Contact us today to learn more about how we can assist you with your next project.